Project M
The Lighting Industry Today:
In North America alone, the LED lighting market is expected to register an incremental growth close to $7 billion by 2022, and the number of companies creating LED lighting fixtures is multiplying by the day. The commercial lighting industry is not your average tech industry where you can look up reviews on Amazon to figure out what the best lighting for your office may be. There are a variety of stakeholders that become a part of the process of lighting up a space that is meant for hundreds to thousands of people a day.
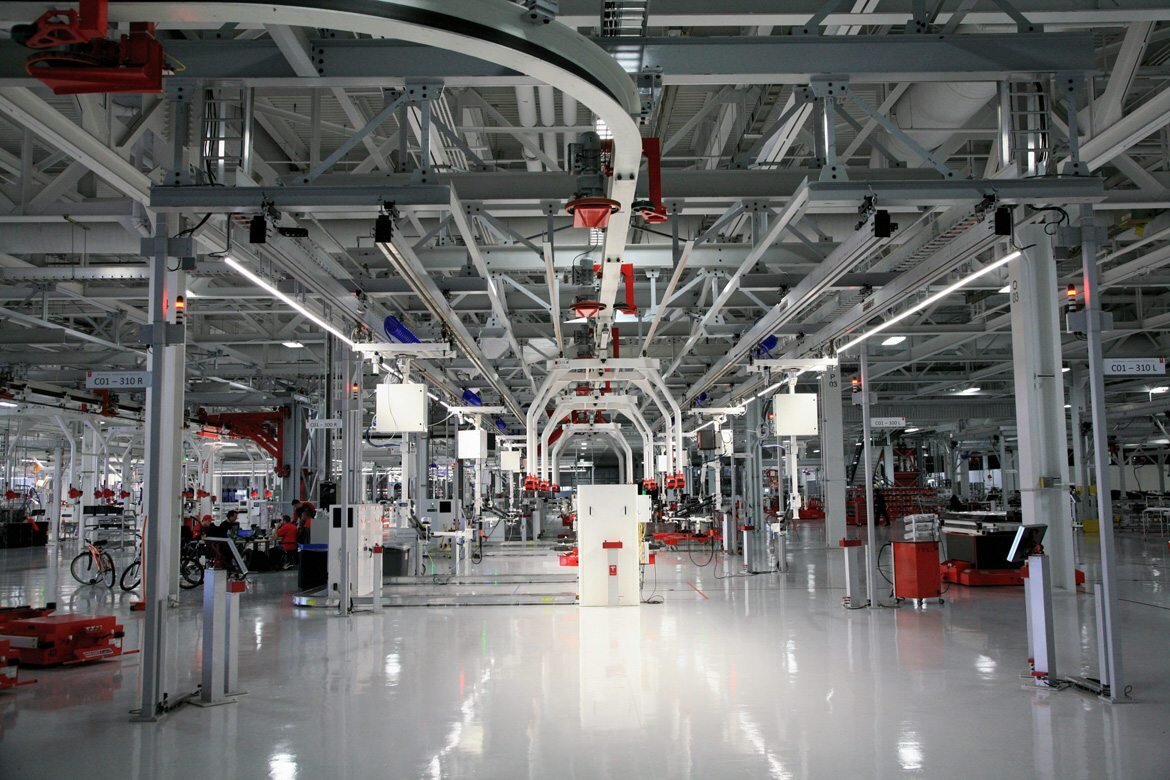
Tesla Facility in Fremont, CA, USA lit up with Ecosense Trov and Rise
The Problem:
The lighting designer is faced with hundreds and thousands of different kinds of lights they must choose from when lighting a space. With sales reps coming to their front door to show them the latest model of LED lights their company just came out with, how will the lighting designer know which lights will meet their needs? And without a sales rep showing them how the light behaves in person, how will they know whether the lights they have chosen best fits their needs or not?
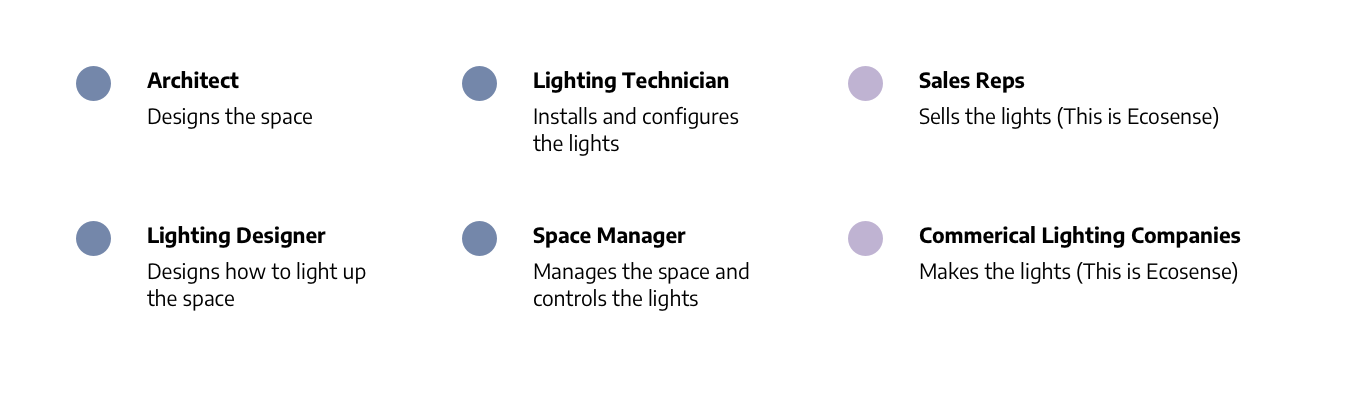

First, the process begins with an architect’s design for a certain space. Second, a lighting designer is introduced to plan out how the lighting in the space will be. The lighting designer may often times be the architect as well, but what they will do at this point of the process is decide what specific lights will be used and where they will be placed in the space. Third, the lighting designer is approached by various sales teams from various lighting companies so they can compare and make decisions on what lights to purchase for the space. Fourth, after the lights to be used is chosen and purchased, a lighting technician or electrician will install the lights into the space according to the lighting designer’s specifications. Fifth, the lighting designer makes sure the lights are configured to their specifications and passes the control over to the manager of the space. The manager now has full control of the lights in the space and will control them however they please, but within the configurations set by the lighting designer.
What are their needs and how can Ecosense address them?
In order to figure out what the purpose of the product would be, I went out to find the needs for each of the stakeholders and how Ecosense can create a product that will alleviate the convoluted user flow of commercial lighting.

Based on the needs of the stakeholders I separated them into 2 buckets that could help lead us to define the purpose of the product:

The informative needs for sales is what we felt Project M can be targeted to addressing. A one-stop-shop for sales and lighting designers to discover and find the specific light fixtures and lighting effects they are looking for.
The technical needs for implementation was decided to be addressed with a different offering that I will introduce in another portfolio piece.
My Role:
I joined Ecosense with little to no knowledge of the lighting industry so researching and understanding the ins and outs of the industry and process for making lighting decisions was the first course of action. Project M was in the early development stages from the R&D team and the product began with no user experience in mind. The app was just a repository for light analysis organized by fixture type. My role for the product was to define what the purpose of the app is by finding who the user base would be and how it could empower them to search and discover lighting fixtures they needed and emulate how the light would appear in the spaces they wanted it implemented. I began by creating an MVP of the application with all the current R&D work that had been done in order to come up with a list of quantitative and qualitative questions that I could ask potential stakeholders in order to figure out who this product’s audience would be. I then created low-fidelity wireframes with no branding in order to map out the user journey with screens based on how they would interact with the product. I worked closely with developers in order to do quick prototyping and a/b testing on users for features. Because this is a brand new kind of product offering we were creating, we held tutorial sessions with the entire sales team to show them how they could utilize the app to increase their sales and efficiency with lighting designers.
Select screens from MVP of Project M:

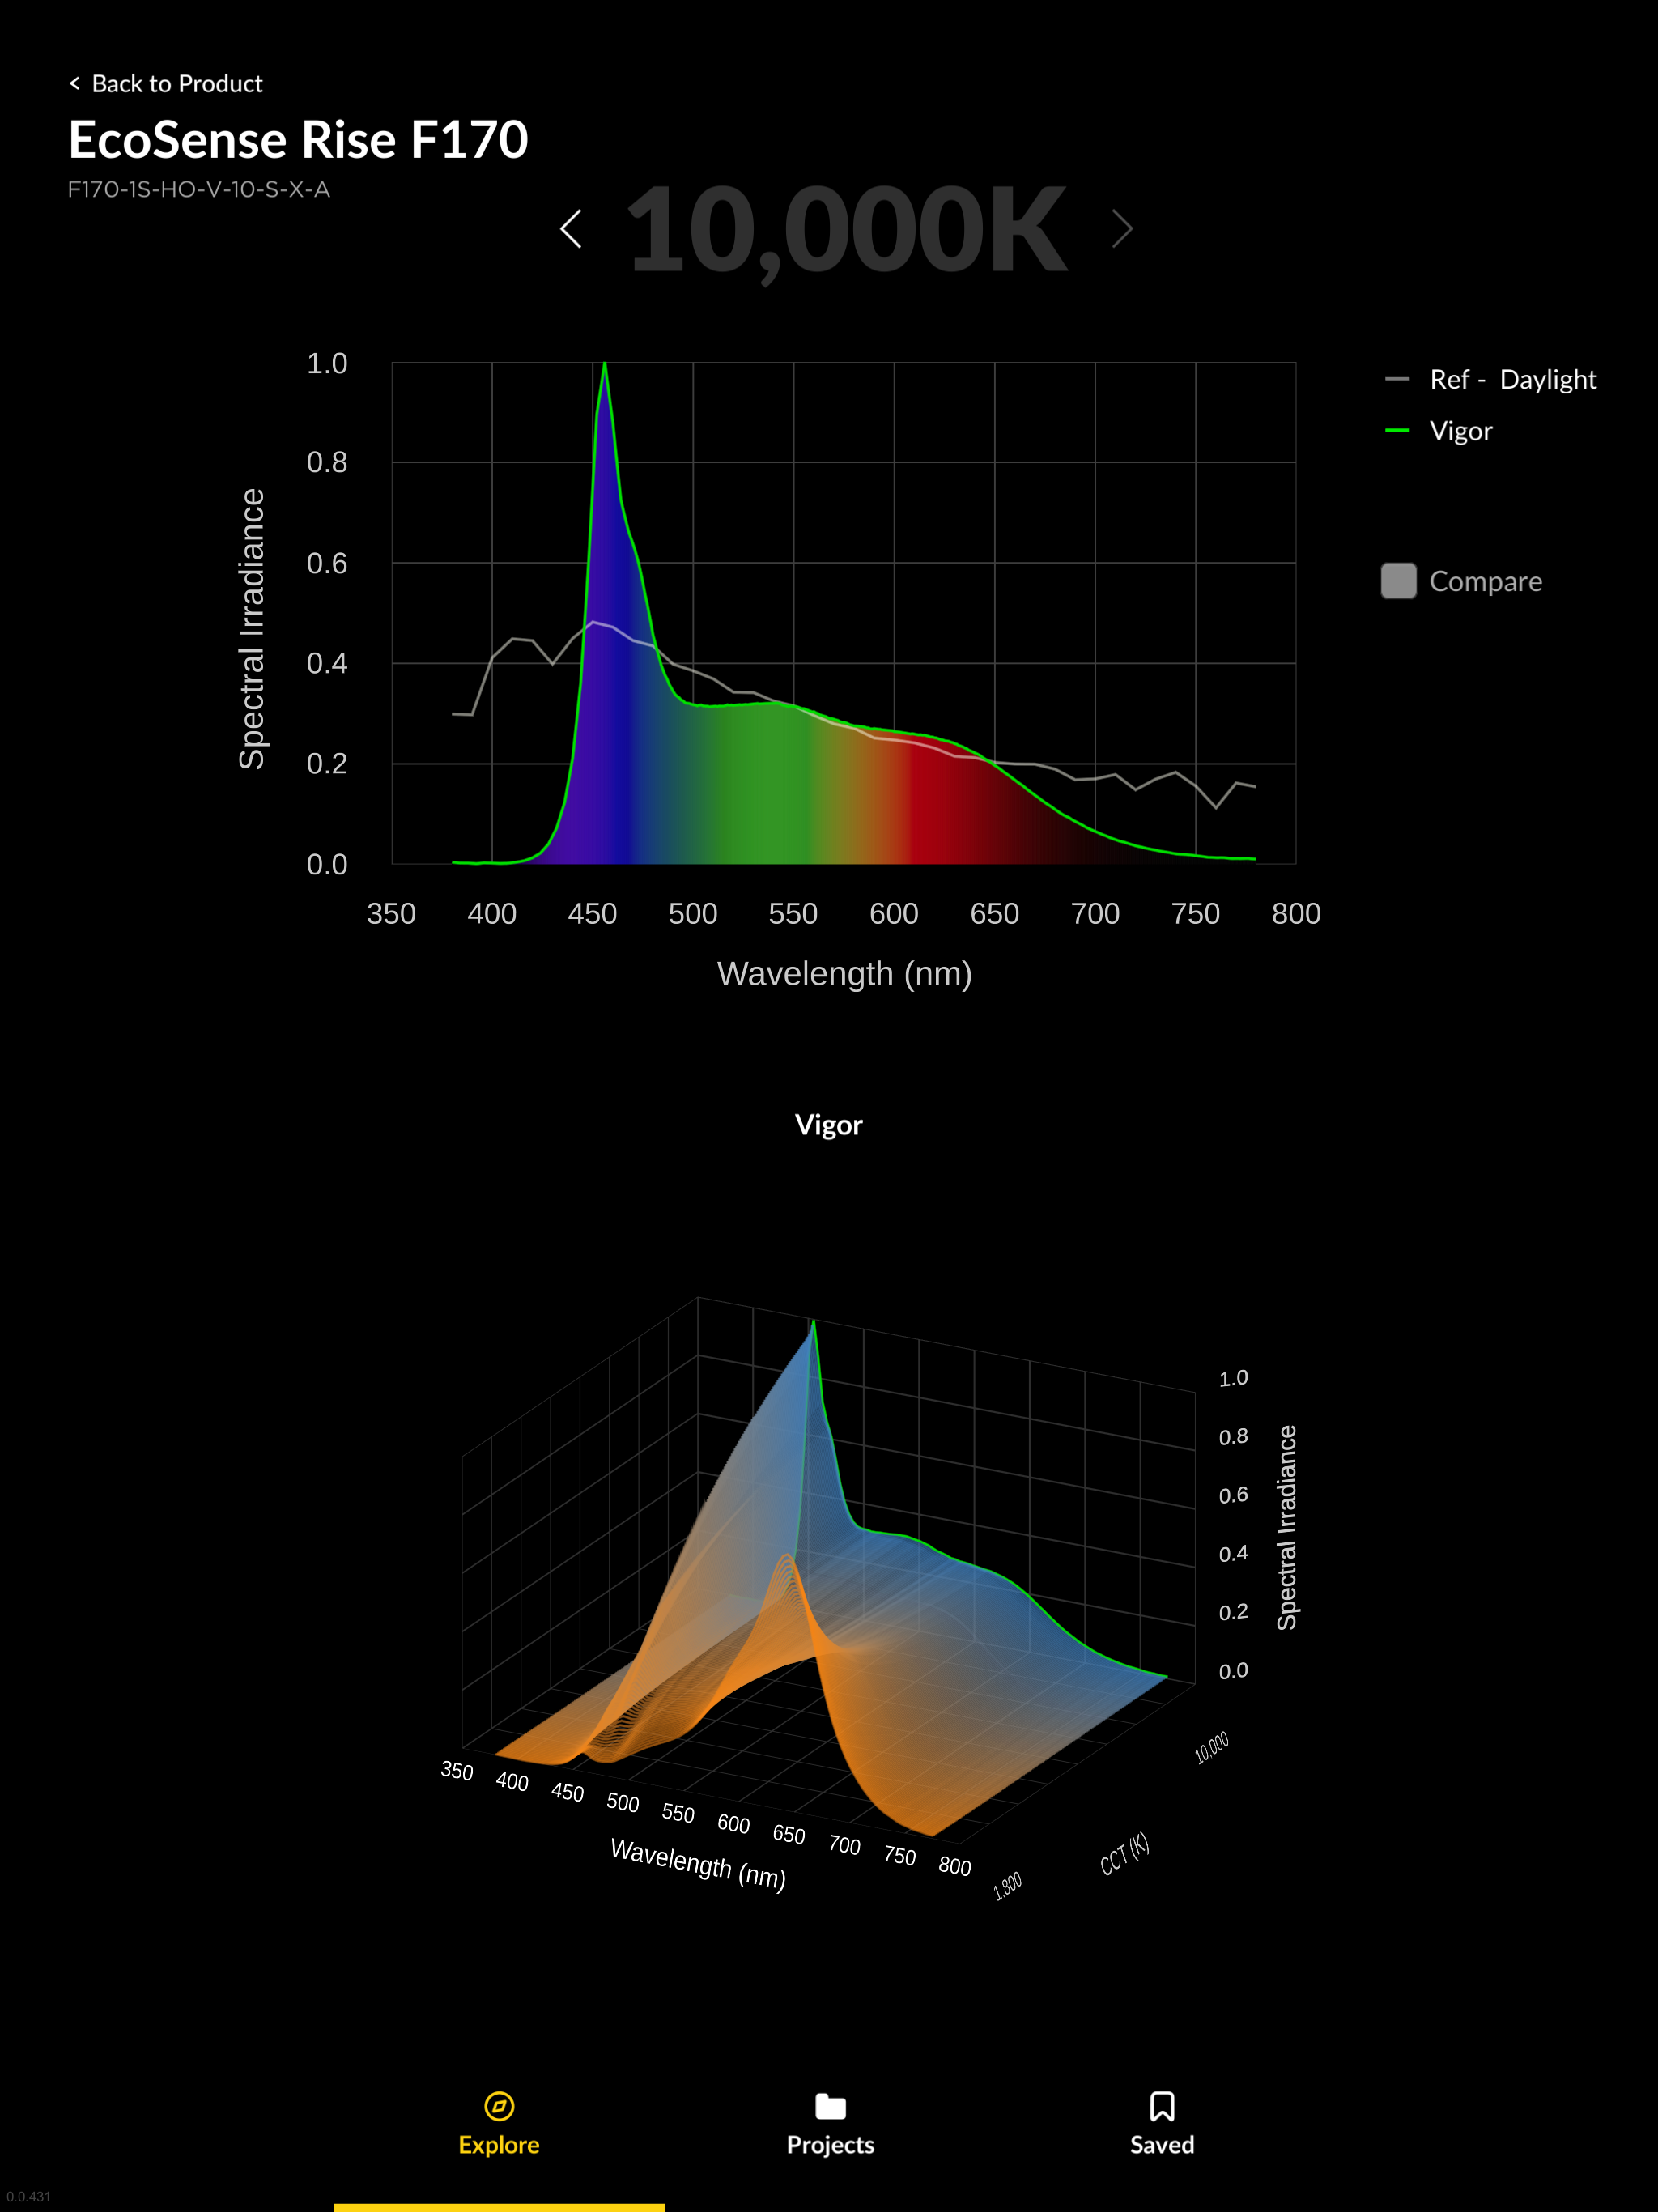
Search and Browse
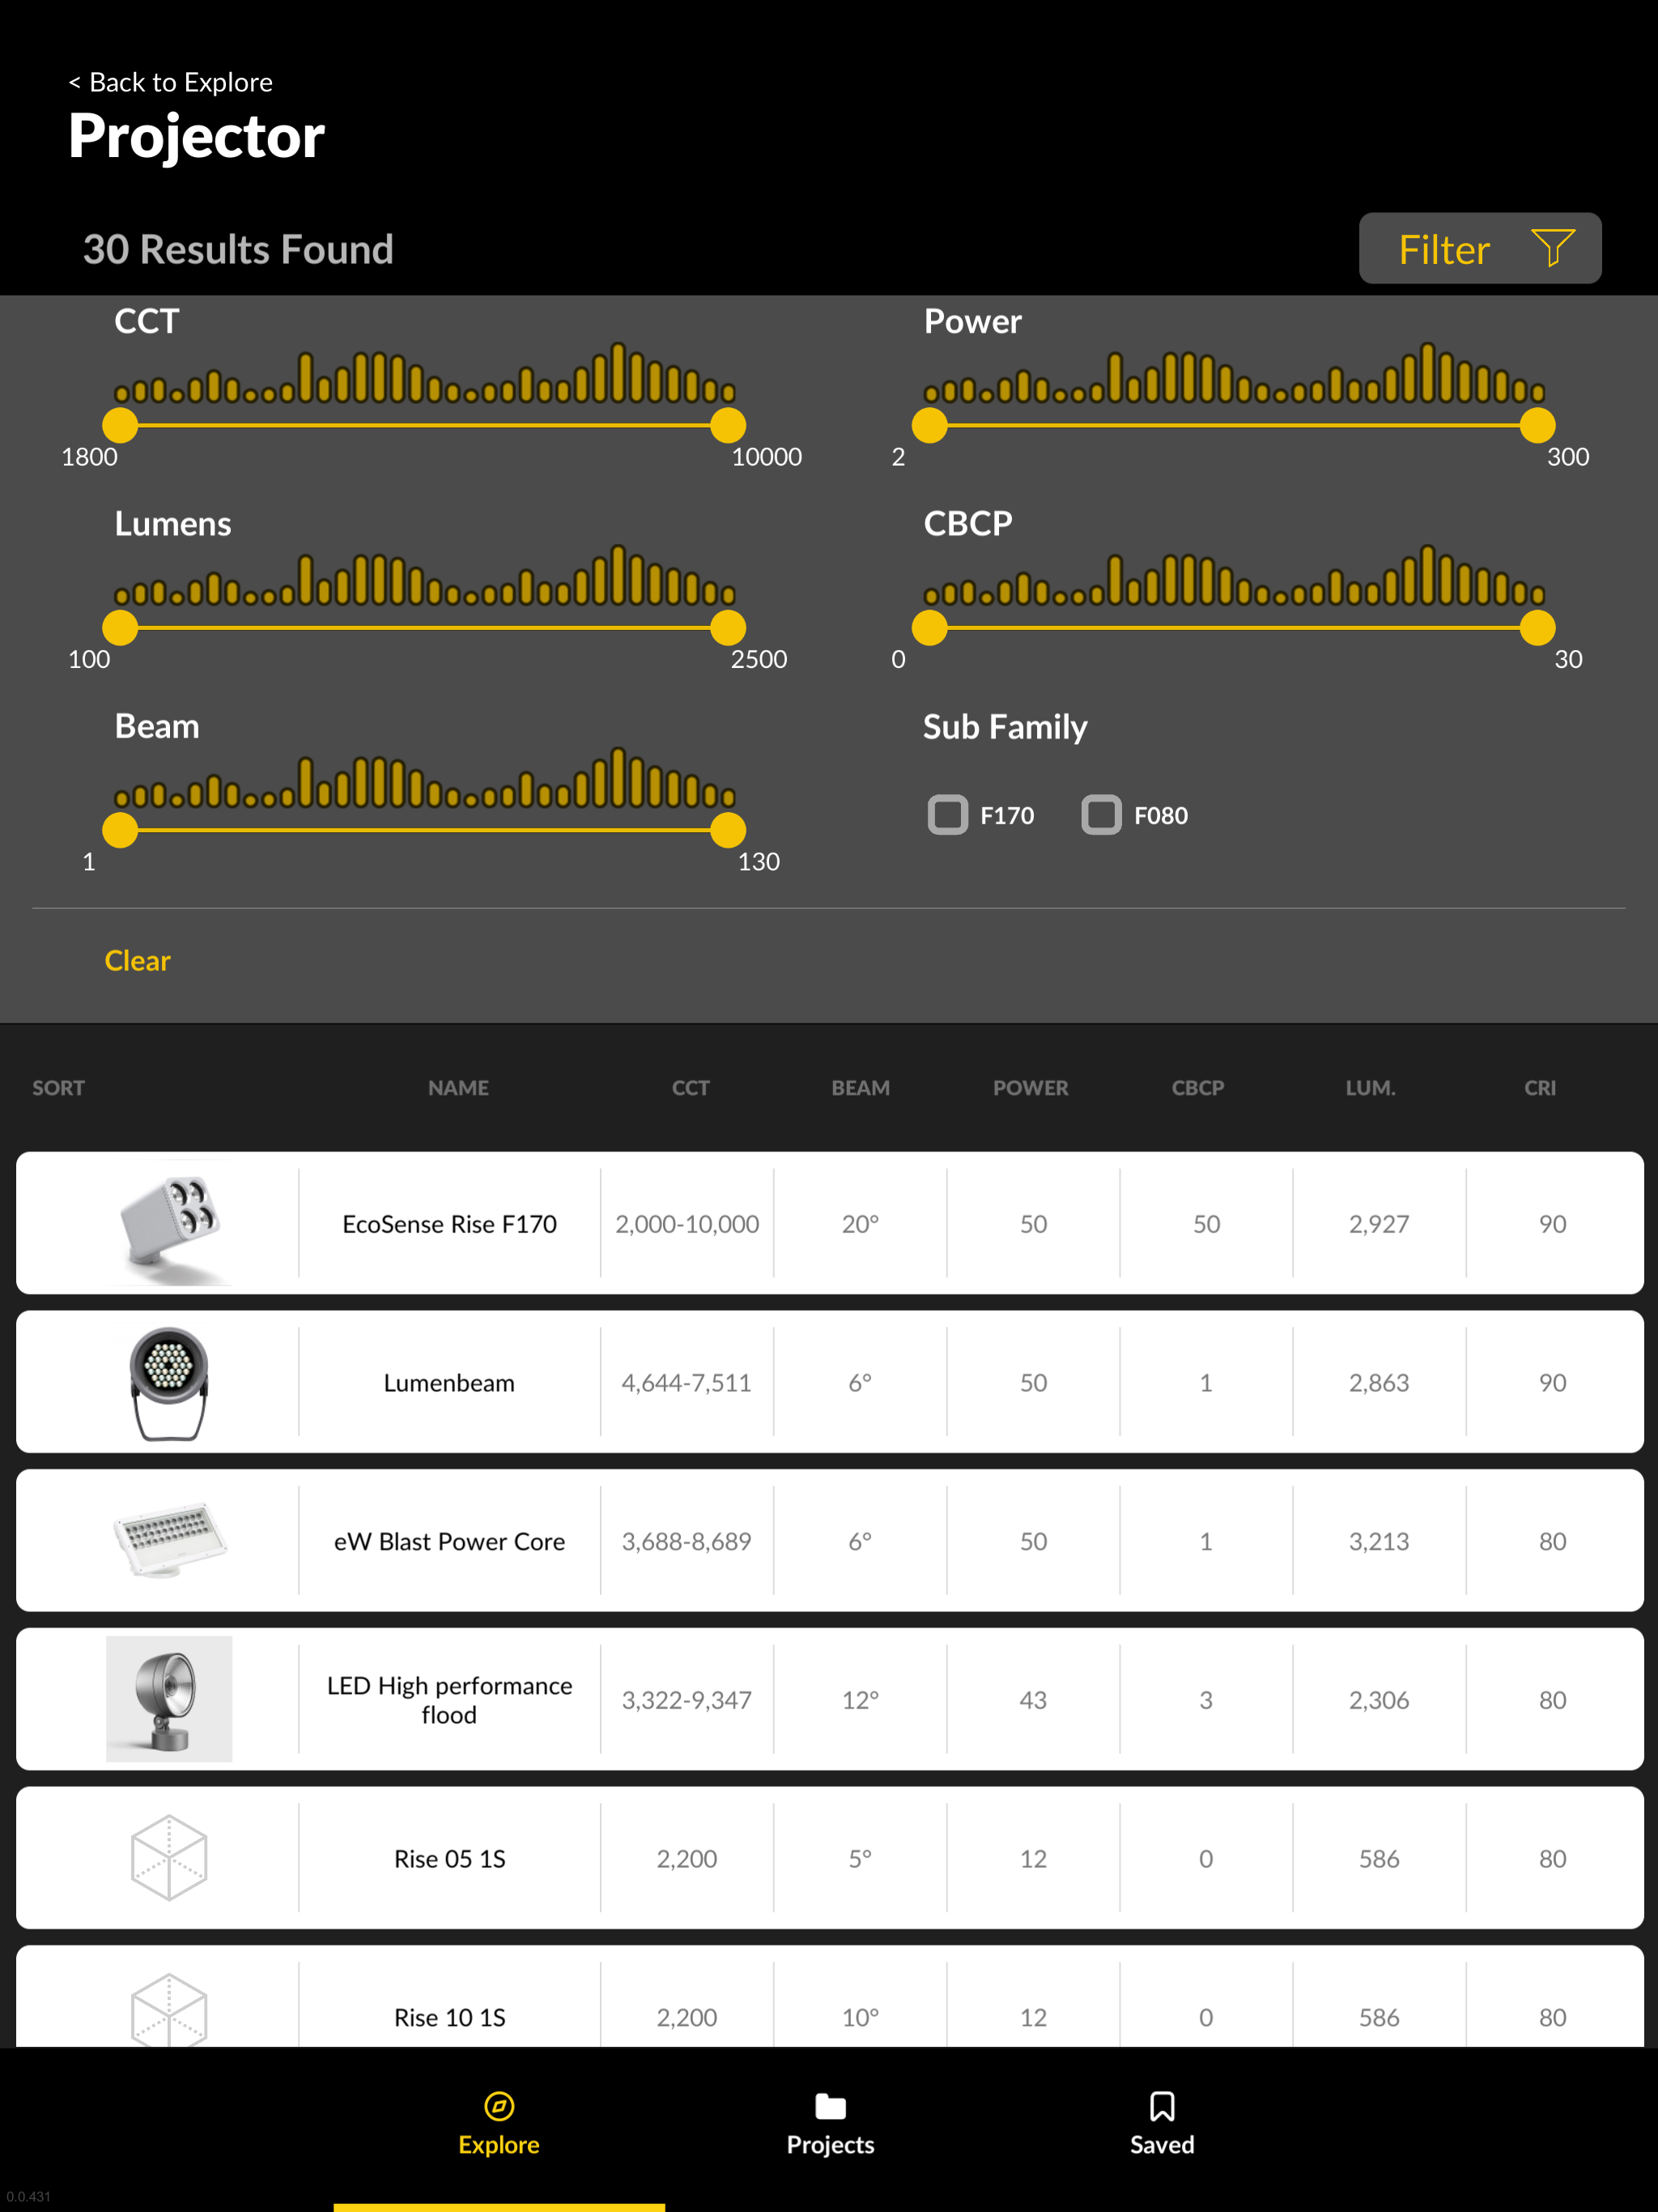
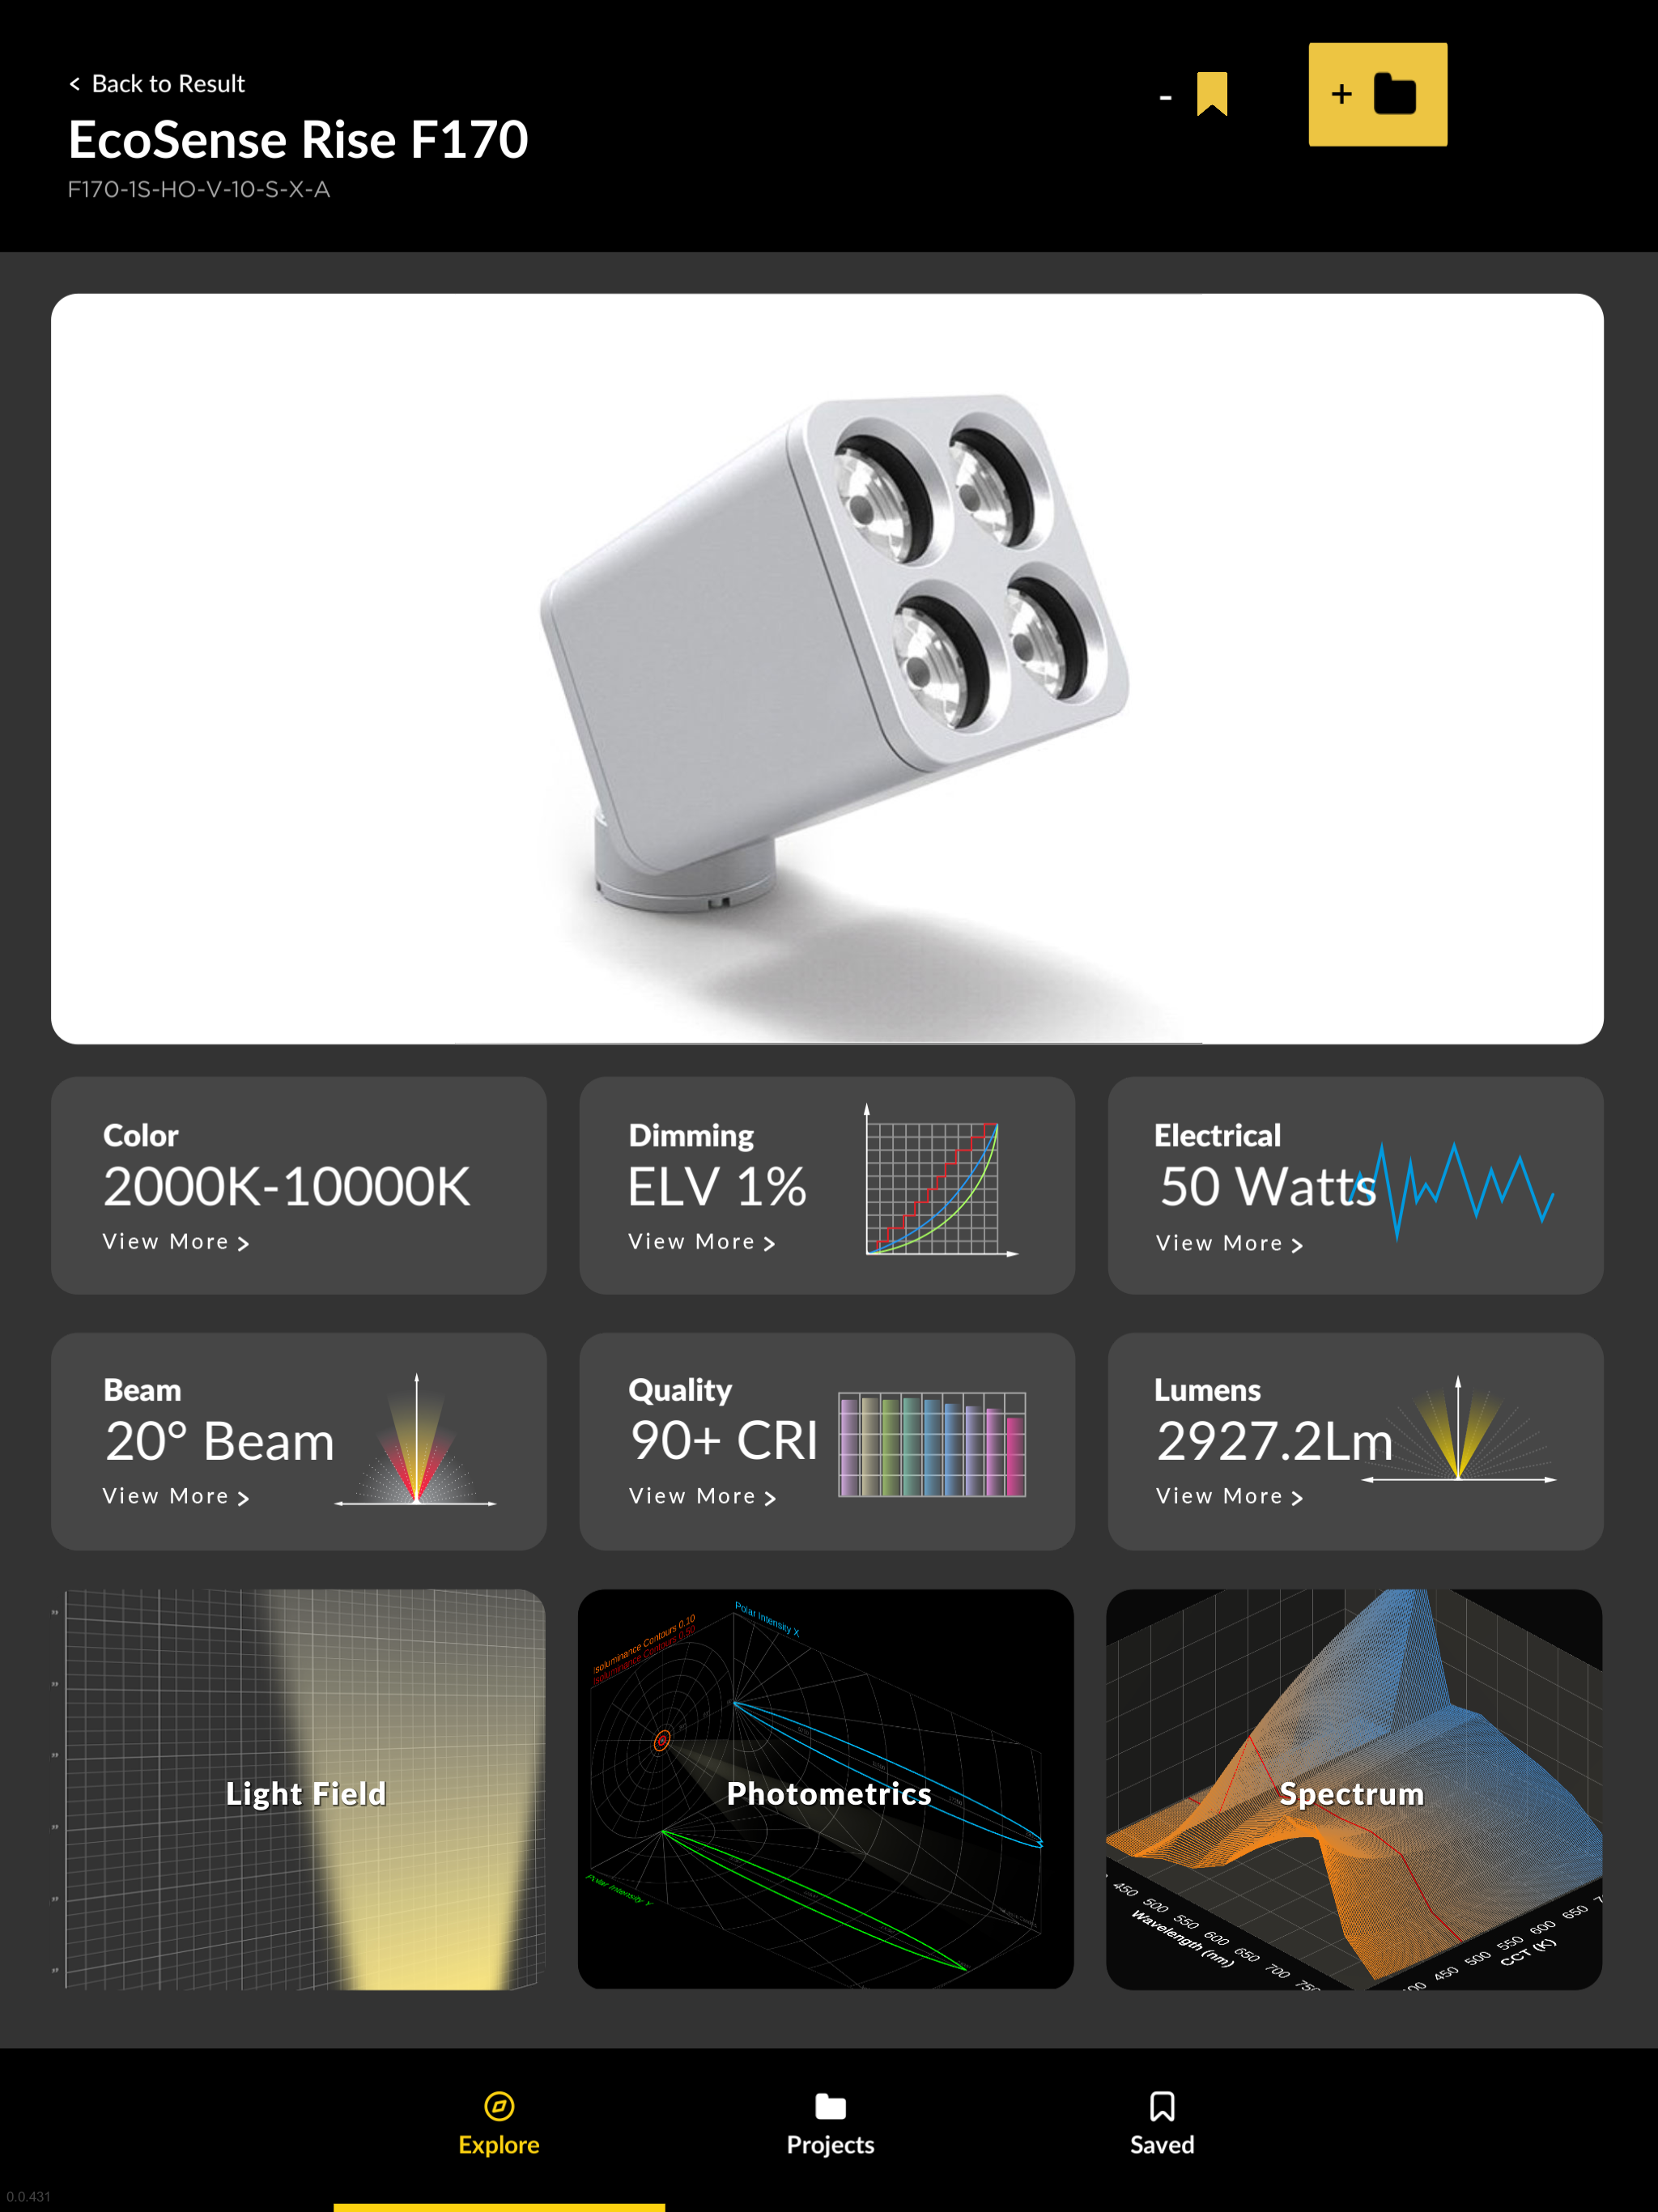
The first functionality that was needed was a way for users to search for the light they were looking for. This could come from the approach of someone knowing exactly what they were looking for, or something just browsing to see what kinds of lights are out on the market. Because of these two different entry points we needed to allow the option to have filters for specific search results and also general categories for users who were looking to browse.


Filter to find specific product specs

Categories for users to browse based on their context
Seeing the product in AR/VR
The biggest pain point for lighting designers is that they need to see the lights in real life and in the context of their space in order to make a confident decision whether to purchase the fixture or not. Sales teams often travel around with multiple fixtures in cases to client meetings with lighting designers because they are aware that showing it to the designer in real life is the most effective sales method. But having an inventory of over a million different lighting fixtures, it is impossible for the sales team to physically carry all the right fixtures they want to show to their client. But with the help of AR/VR technology we can help simulate how the lights will look in order for the lighting designer to examine and see all of the lights we offer at once.

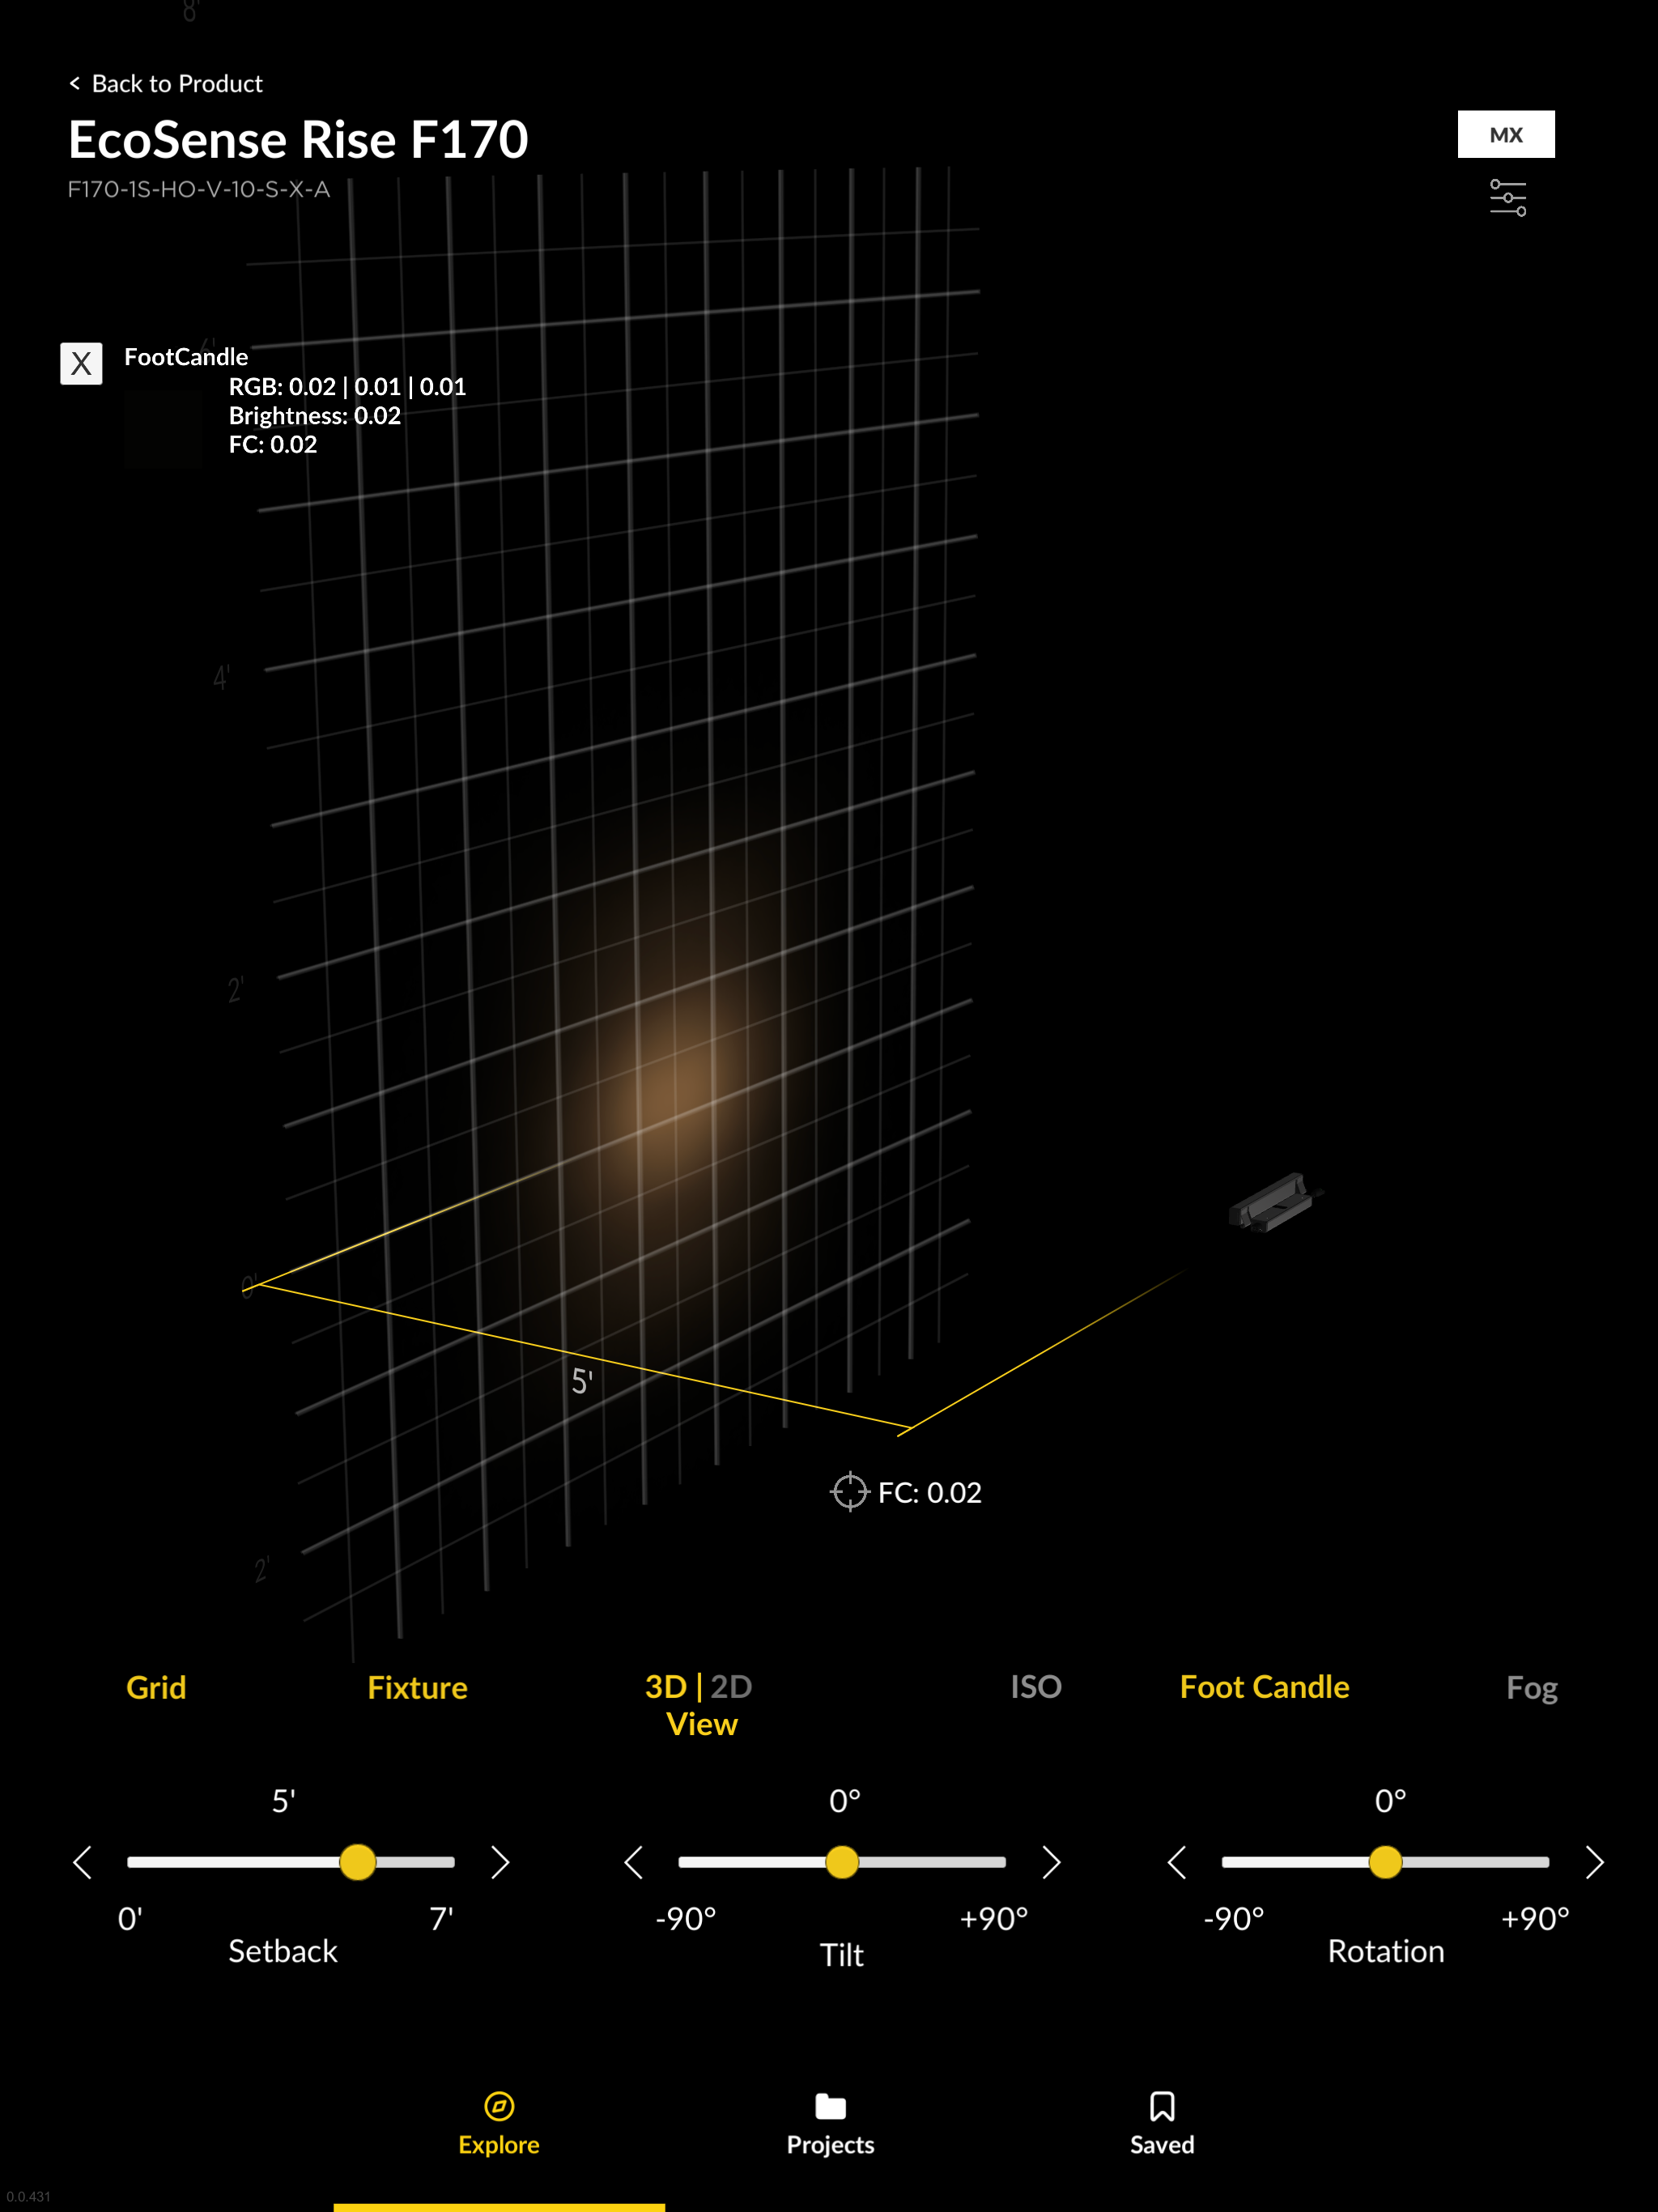
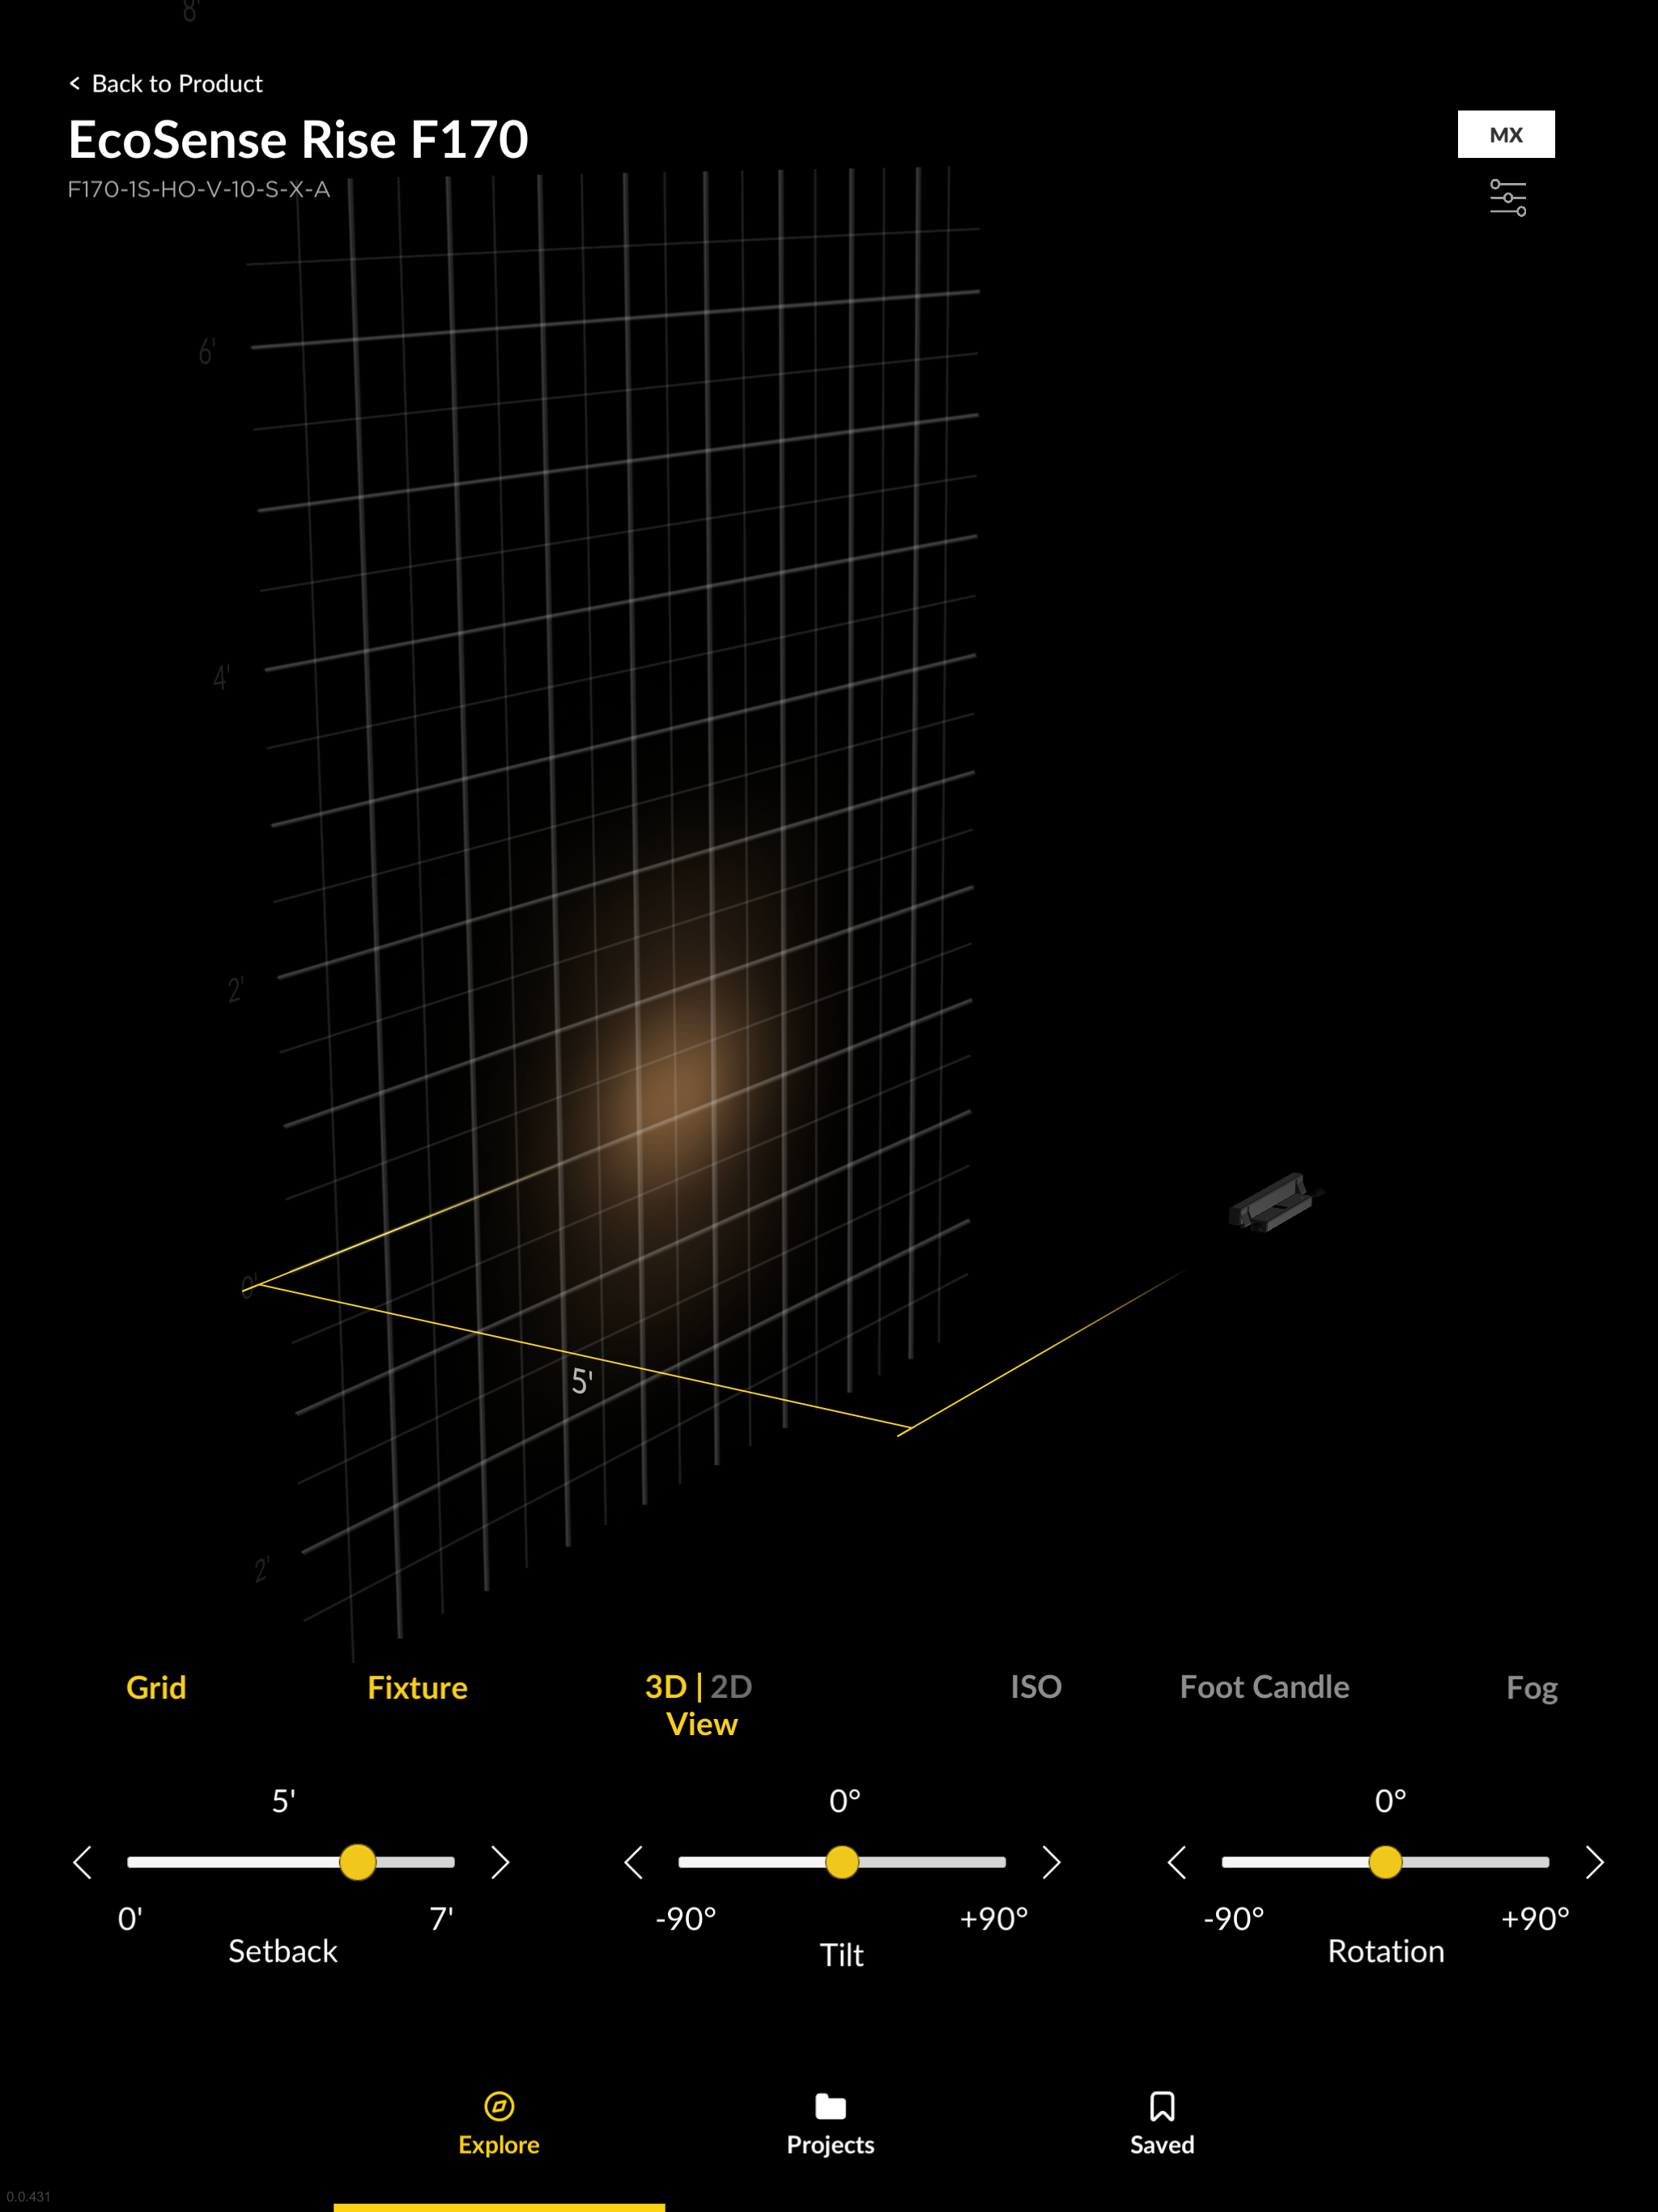
A Blackbox Environment
One of the most valuable features of this product is the ability to see any chosen light in a space and change the location of the light in relation to where it will shine. This allows the lighting designer to see the quality of the light beam and the limitations to the spread and intensity of light.
This iteration of the light simulation was a step in the right direction for seeing the quality of light and being able to analyze the beam, however it did not address the real problem of lighting designers needing to see the light in context of the space that they were designing for. I worked closely with the R&D teams to find a way we can incorporate the lighting into real spaces using the iPad camera and overlaying lighting onto the space.
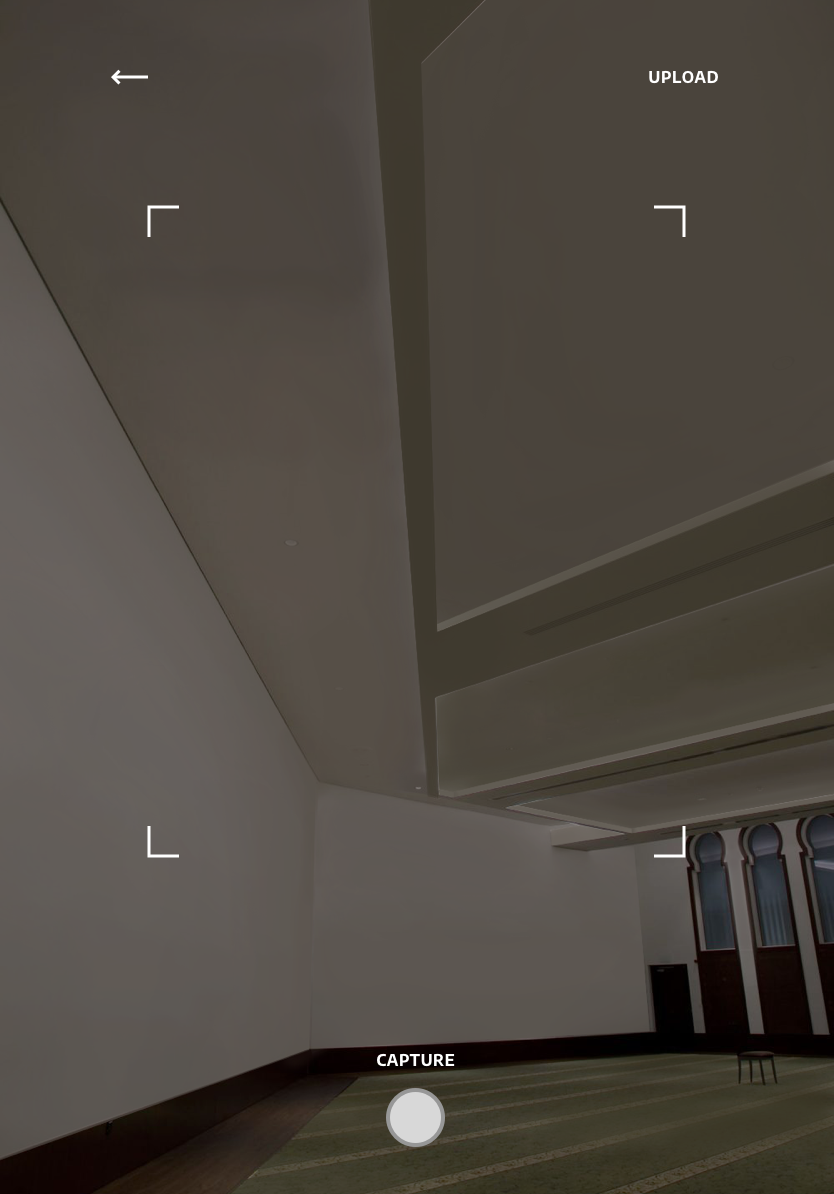
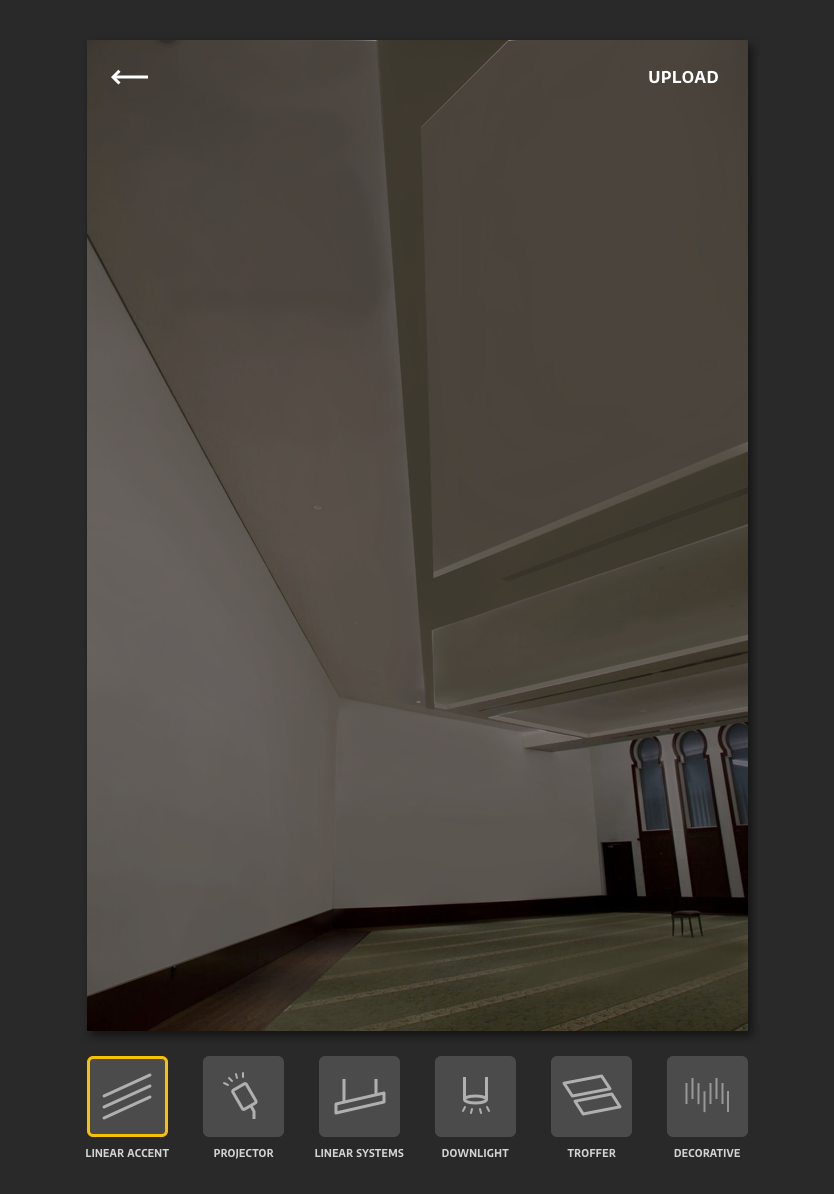
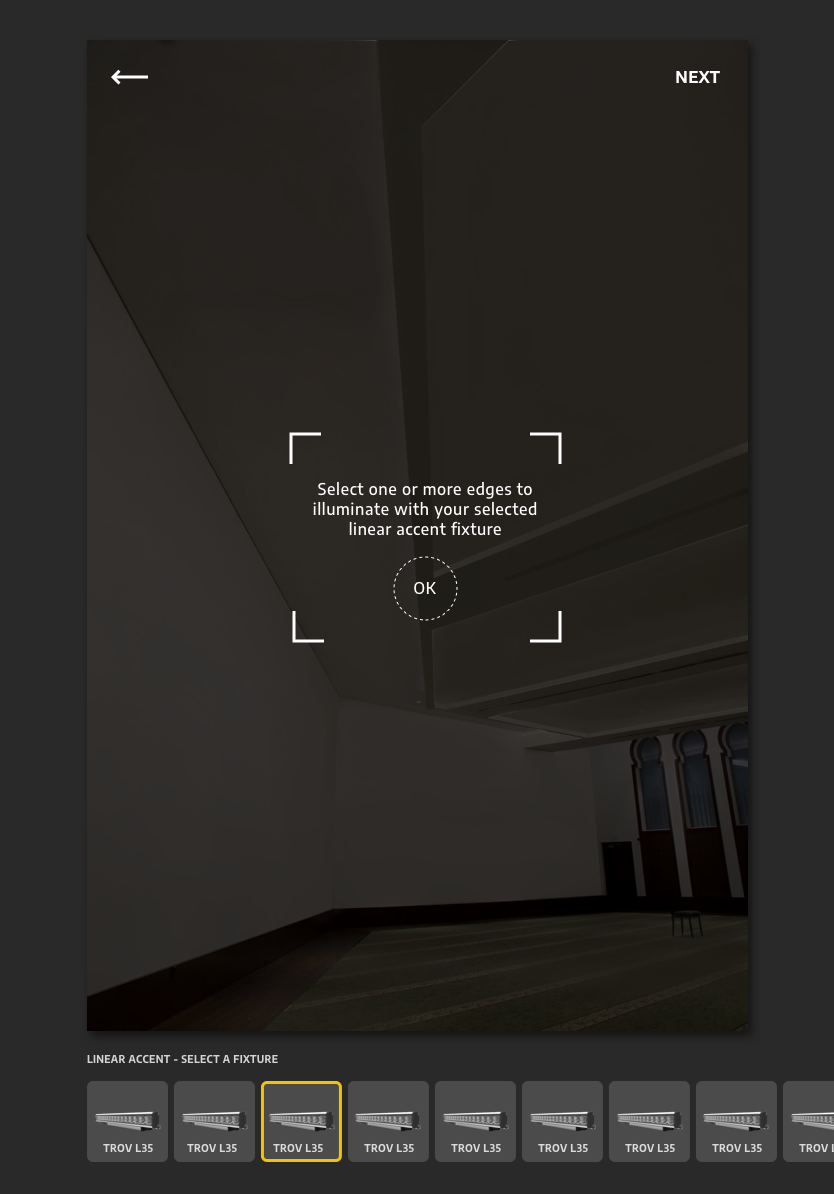
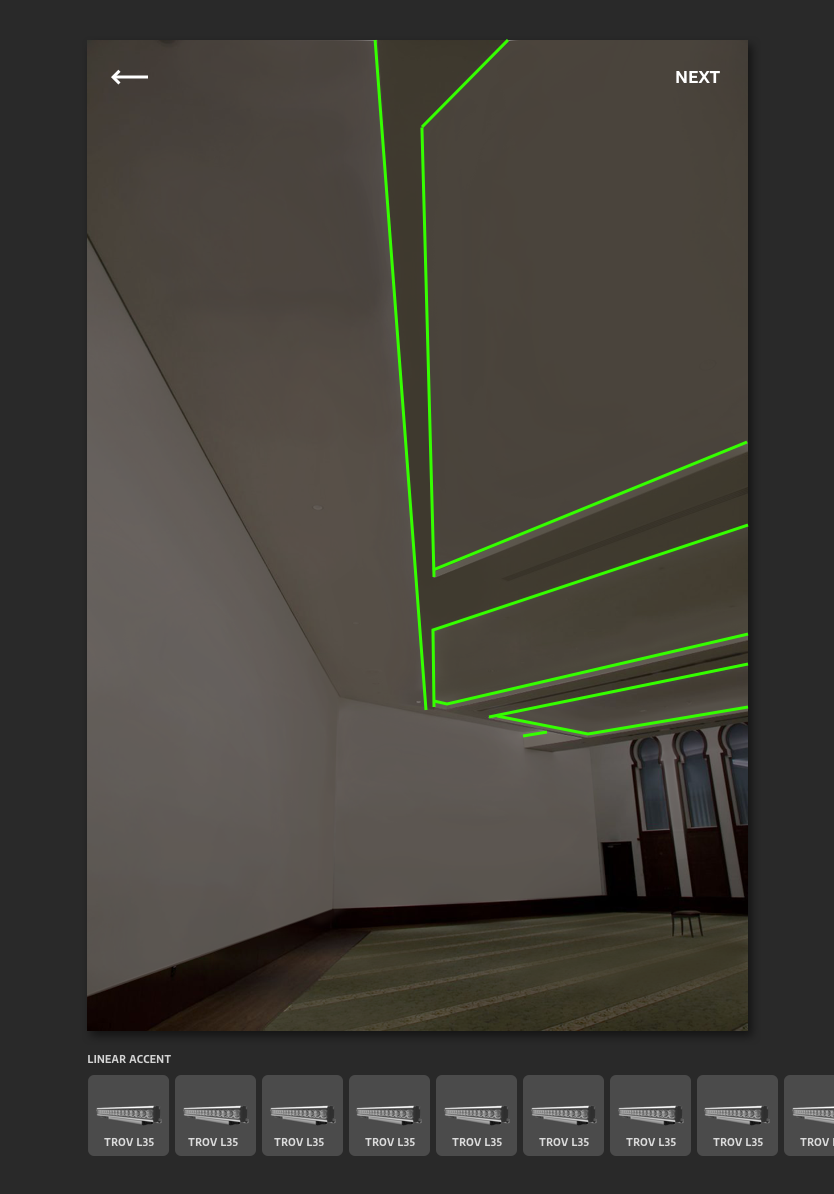
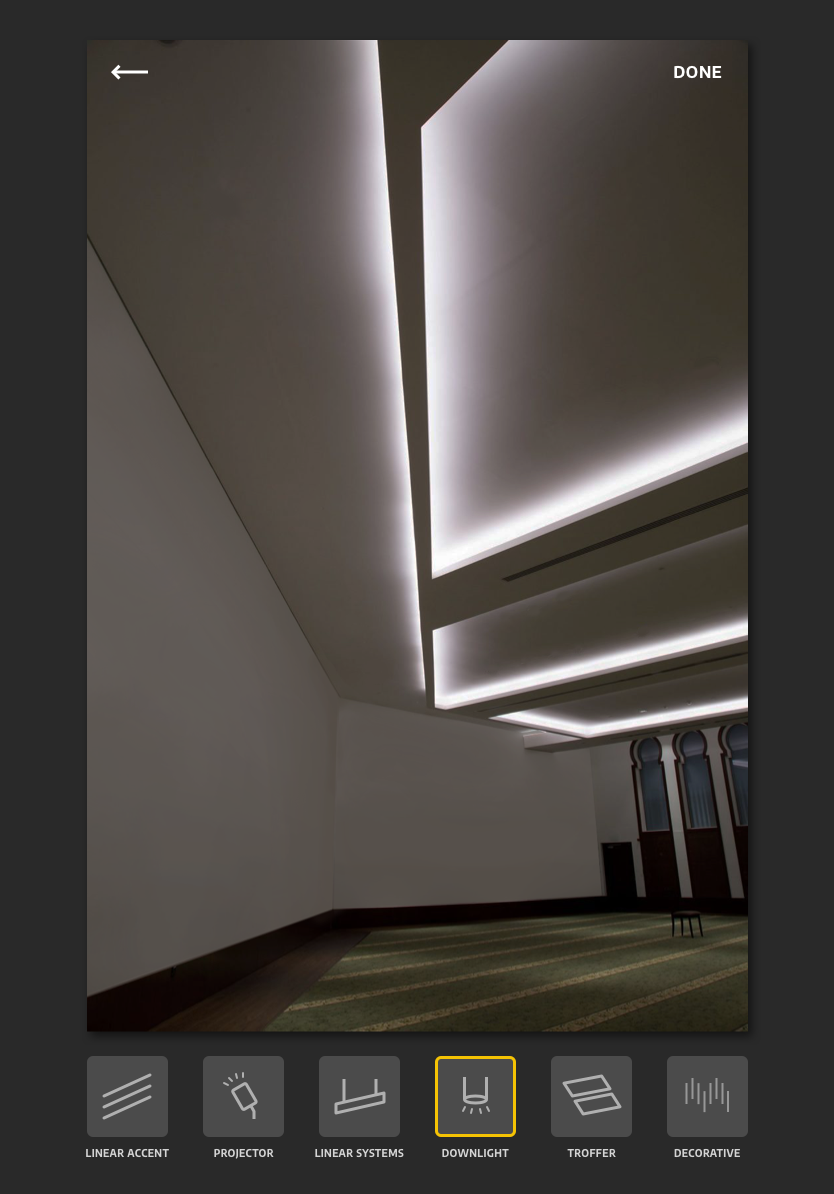
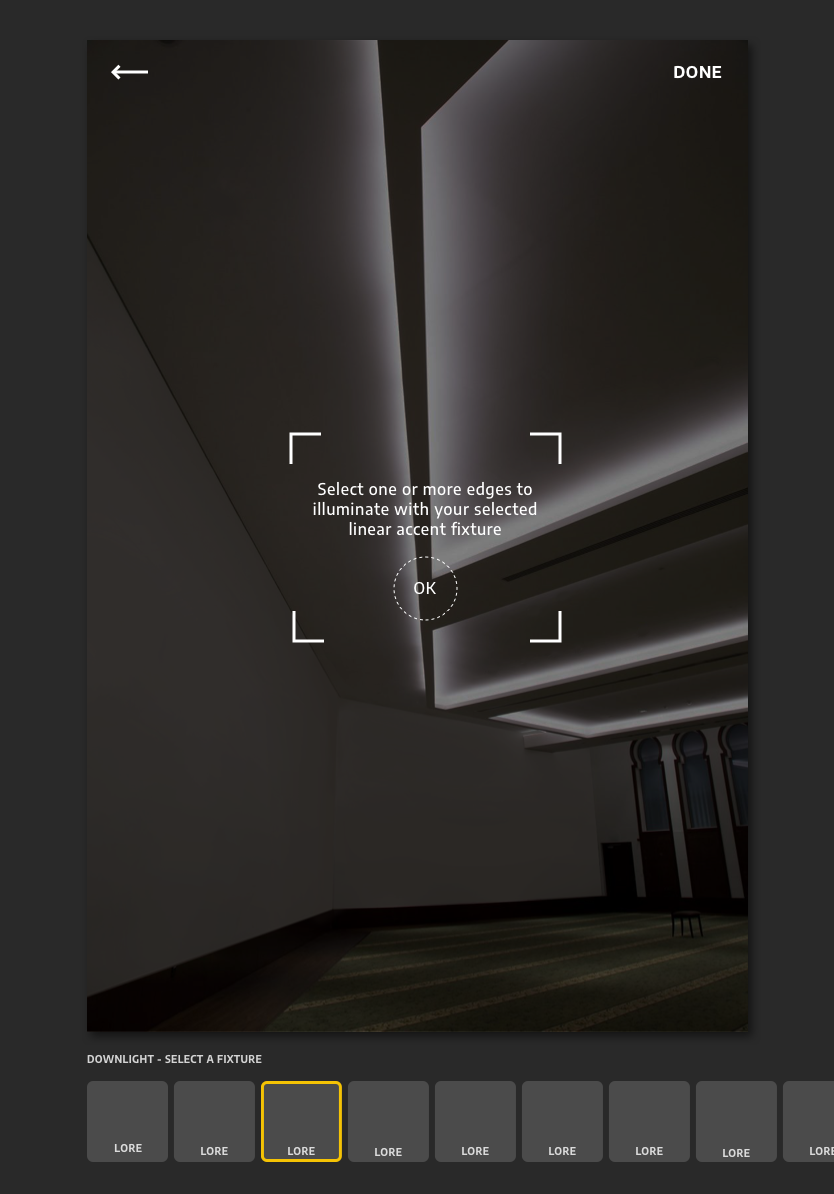
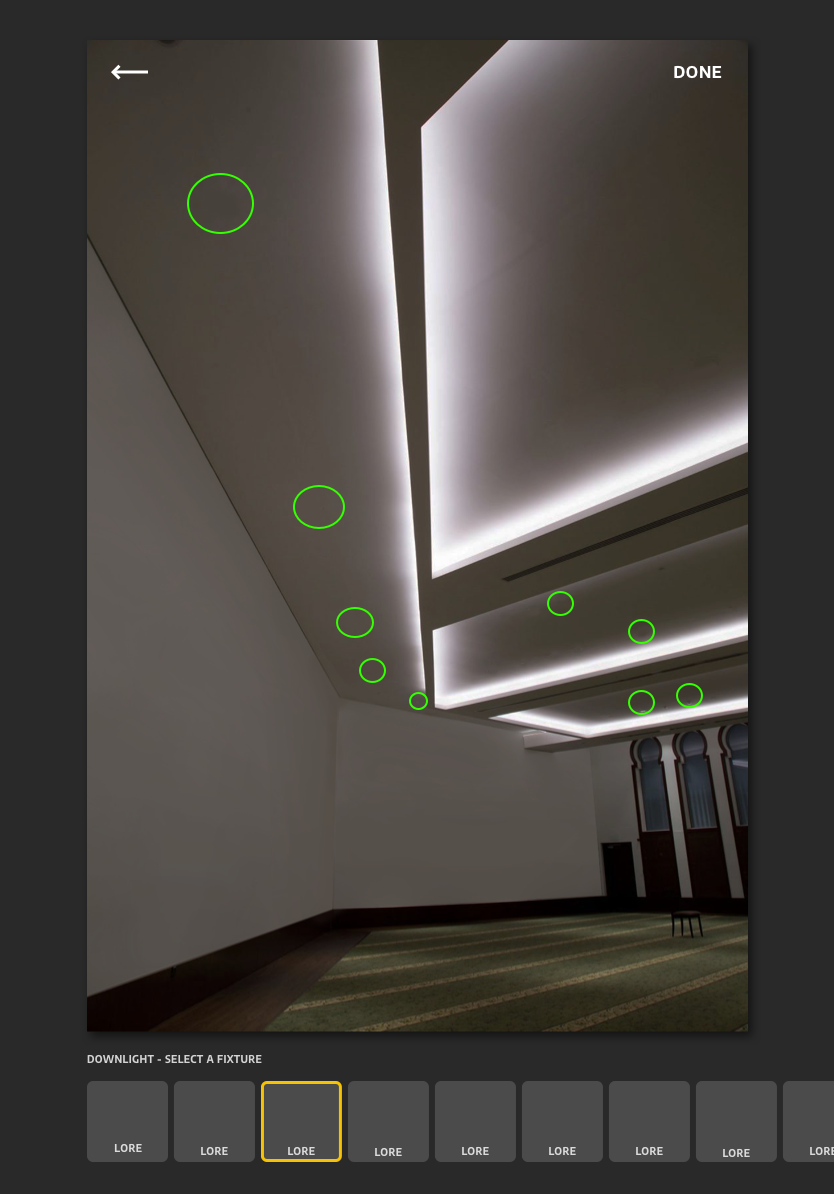
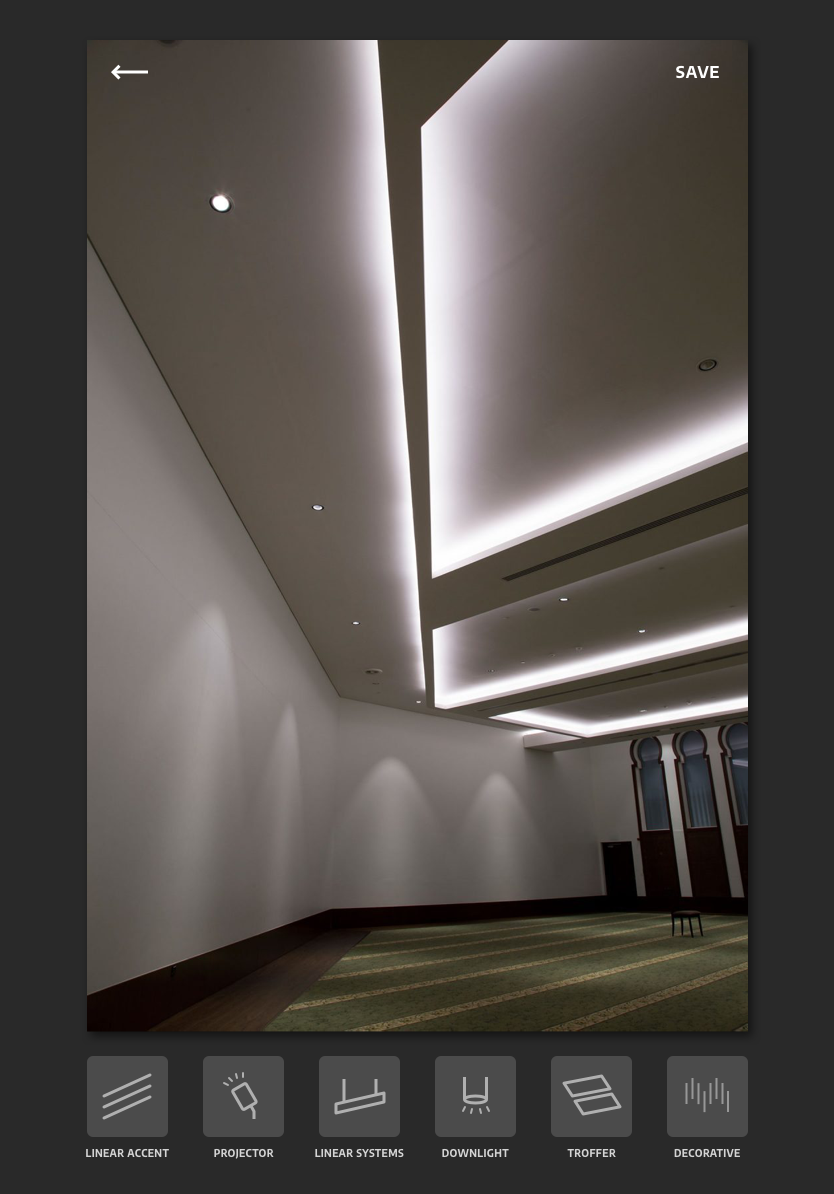
Lighting the Context
This iteration of the light simulation incorporates the camera of the iPad to capture the space needing to be lit up. We allow the users to select edges of the room or spaces in the ceiling to superimpose lights and see how the room can look lit up. This becomes much more useful to the lighting designer to see how the lights will look in the space.
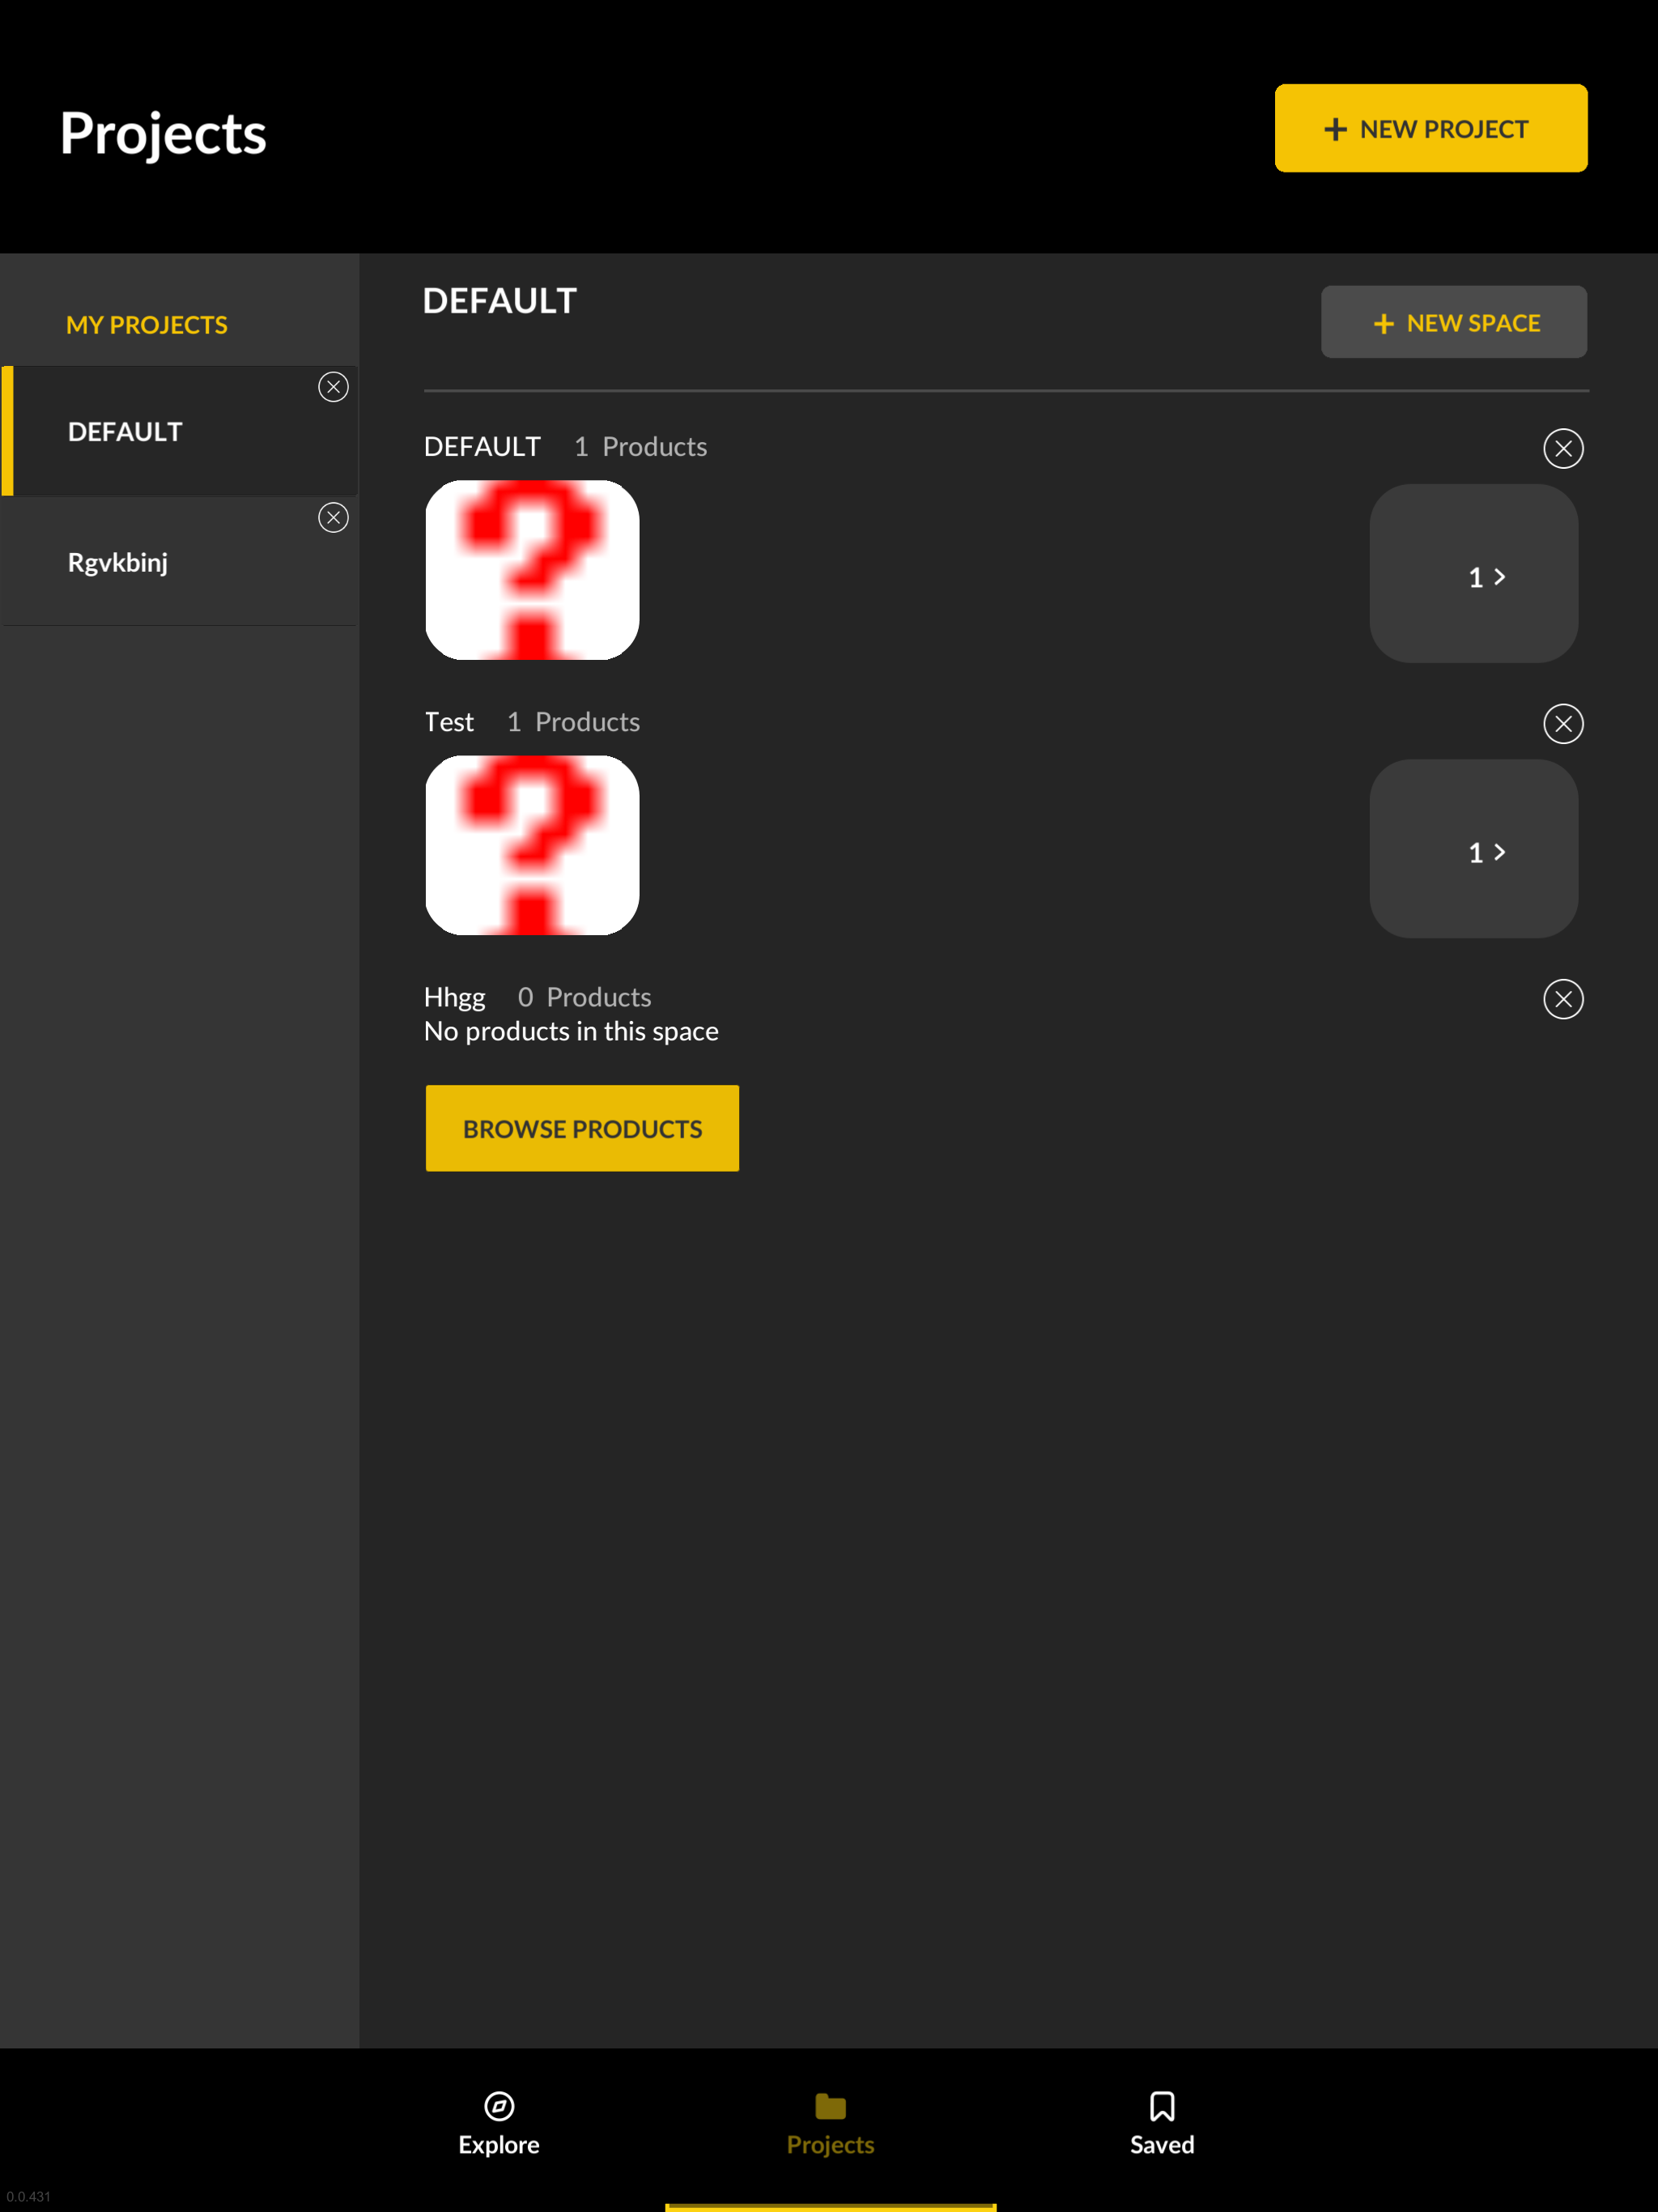
Comparing Lights
Based on the feedback we gathered regarding seeing the lights in a blackbox environment was that a user could only view one light lit up at a time and this made it difficult for them to compare light fixtures side by side. The purpose of the app being a tool for sales and lighting designers to view and compare the lights, we understood how a comparison feature was needed. Taking inspiration from typical browser interfaces, I felt implementing a tab design would allow users to quickly compare multiple lights without losing their modifications to each light and have the option to save all of the open tabs as a project so they could revisit their comparison history.

The Face Lift Studies
Beginning as a project coming out of the R&D team, the visual design of the app was put on the back burner for a while. But as Project M ramped up and began to be scheduled for deployment, I implemented interface changes in order for the app to be more cohesive with our company’s branding and followed guidelines of a design system I put in place for our software products.

Visual design exploration 1

Visual design exploration 2

Visual design exploration 3
App tutorial

Project M is a unique tool that does not exist on the market for sales teams to leverage, so we believed a tutorial session for the sales team would be helpful for them in learning the ins and outs of the app. We held a tutorial session during an All Hands meeting so we could introduce the product to the entire company. The goal of the tutorial was to get our Sales team to become expert users of the app so that they can discover creative ways to leverage the app to boost their sales. Each sales rep received an iPad with the app installed and after the tutorial session was given 2 weeks to try it out and we followed up with questions to gather feedback.
Outcome
Project M was well received by the sales team as a tool they could begin leveraging to increase sales and efficiency. Sales reps are enthusiastic in providing us with feedback in what they feel the app could improve on and we have been working on prioritizing their needs in order to make this a tool that could eventually be available for lighting designers to leverage as well. There are still many bugs and kinks we are constantly fixing in order to improve the product but it has put Ecosense in a unique position where we can show accurate data and analysis of lighting fixtures. Our next steps for the app includes implementing a more powerful AR/VR experience as well as including other commercial lighting company fixtures so this becomes the source of truth for not just Ecosense lighting fixtures but all commercial lighting fixtures.